Title: Simplifying Photo Uploads: A Step-by-Step Guide to Uploading Photos to Google Drive from Android
Introduction:
Hey there! In today's blog, we'll walk you through the seamless process of uploading photos from your Android device to Google Drive. Whether you want to free up space on your phone or share images with others, Google Drive provides a convenient and secure solution.
How to upload photos Google drive from Android
One of the easiest ways to upload single or multiple photos, videos, etc., to Google Drive is using the built-in upload functionality in the Google Drive app.
Step 1: Install the Google Drive Android app on your phone in case it isn’t installed already.
Step 2: Launch the Google Drive app on your phone. Now you can either upload the photos directly in the root directory or in a particular folder. For the latter, tap on the folder to open it and then follow the next step.

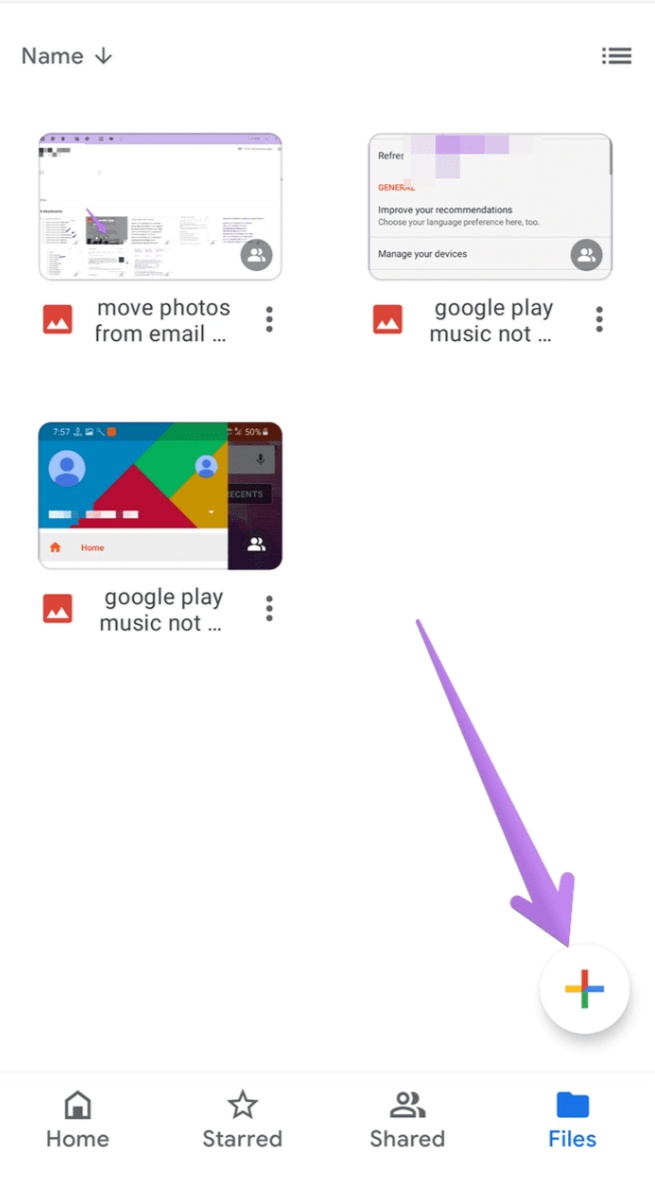
Step 3: Tap on the floating Add icon and hit the Upload button from the pop-up screen.
Step 4: The File Explorer app will open. Tap on the photo that you want to upload to Google Drive. The photo will be added to Google Drive, and you will see the status of the photo.
How to upload multiple photos & media
To upload multiple photos, touch and hold any one of the photos to select it. Then tap on other photos to select them. Finally, tap on the Select option at the top to upload them to Drive. The app will take you to the Google Drive screen where the file uploads is in progress.
Upload directly others apps :
In this method, you don’t need to open the Google Drive app every time you want to add photos. You can use the Share menu from any app – be it a File Manager, Gallery, or chat apps, to upload photos in any Google Drive folder.
Here are the steps:
Note: The following steps are performed on a Gallery app but can be used for other apps. Also, the Google Drive app needs to be installed on your phone for this method to work.
Step 1: Launch the app from which you want to add the photo to Google Drive. Open the required photo or select multiple photos.
Step 2: Tap on the Share icon. Look for Drive (or Save to Drive icon) in the menu. Tap on it.
Step 3: The Save to Drive screen will open. Type the name of the photo or use the suggested name. Select the required account if multiple accounts are added. Also, select the Google Drive folder where you want to save the photo. Tap on the options to choose a different account or folder.
In the case of folders, you will be taken to the Google Drive app. Use the back button at the top to navigate and select the required folder. Once you are in the desired folder, tap on Select at the bottom.
Step 4: You will reach the Save to Drive screen again. Tap on Save.
METHOD 3: AUTO-SYNC PHOTOS AND ADD FOLDERS
The above two methods are limited in functionality. Firstly, Google Drive doesn’t offer a photo auto-sync feature. Secondly, you cannot upload folders to Drive using the mobile app. You will need to use Drive on the computer for the same purpose.
Fortunately, both these limitations can be defeated using third-party apps. We have covered how to auto-sync photos to Google Drive and how to upload folders to Google Drive on Android.
Upload from Google drive app :
Step 1: Install Google Drive App
If you haven't already, head to the Google Play Store, search for "Google Drive," and install the app. Once installed, open the app and sign in with your Google account.
Step 2: Navigate to Photos
Access the menu by tapping the three horizontal lines in the top-left corner. Select "Photos" from the menu to view all your images on your device.
Step 3: Select Photos for Upload
Choose the photos you want to upload by tapping and holding on an image until it's selected. You can select multiple photos at once by tapping on each desired image.
Step 4: Tap the Upload Icon
Look for the "+" or "upload" icon, usually represented by a cloud or arrow pointing upwards. Tap this icon to initiate the upload process.
Step 5: Choose Google Drive as Destination
You'll be prompted to select the destination for your photos. Choose "Google Drive" from the list of options.
Step 6: Select Destination Folder
If you have specific folders in Google Drive, choose the appropriate one or create a new folder. Confirm your selection to proceed.
Step 7: Monitor Upload Progress
Once you've selected the destination, the upload process will begin. Monitor the progress bar to see how long it will take for your photos to be uploaded to Google Drive.
Step 8: Access Your Photos on Google Drive
Once the upload is complete, head to the Google Drive app or the Google Drive website to access your photos. They will be organized within the selected folder.
Conclusion:
You've successfully uploaded your photos from your Android device to Google Drive. This not only allows you to free up space on your phone but also provides a secure backup and easy sharing options. Make sure to regularly organize your photos on Google Drive for a clutter-free experience. Happy uploading!