Title: A Step-by-Step Guide to Downloading and installation the Latest Version of Java
Introduction:
Java, a versatile and powerful programming language, is widely used for developing applications, websites, and various software solutions. Keeping your Java environment up to date is essential to benefit from the latest features, performance improvements, and security patches. In this guide, we'll walk you through the steps to download the newest version of Java.
Installing Java correctly is crucial for getting started with coding. In this guide, we'll walk you through the process of installing Java on your system
Step 1: Check Your Current Java Version
Before you proceed, determine which version of Java you currently have installed. Open your command prompt (Windows) or terminal (macOS/Linux) and type:
Copy code
java -version
This will display the installed Java version. Take note of it before moving on.
Step 2: Visit the Official Java Website
Open your web browser and go to the official Java website: https://www.java.com/en/. This is where you'll find the most up-to-date version of Java.
Step 3: Choose the Latest Version
On the Java website, you'll find a prominent download button. Click on it to access the download page for the latest version of Java.
Step 4: Accept the License Agreement
Before you can proceed with the download, you'll need to accept the Oracle Binary Code License Agreement. Read through the agreement and click the checkbox to indicate your acceptance.
Step 5: Select the Correct Download Version
Java offers different versions for various operating systems. Make sure to select the appropriate version for your system. Choose between Windows, macOS, or Linux, and select the version (32-bit or 64-bit) that matches your system configuration.
Step 6: Initiate the Download
After selecting the correct version, click the download link to start the download process. Your browser will prompt you to save the file. Choose a location on your computer where you want to save the installer file.
Install your java app
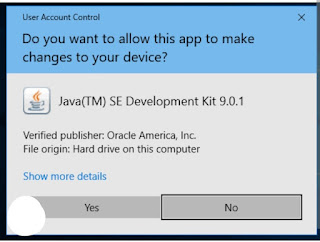
Once the download is complete, locate the installer file on your computer and double-click it to start the installation process. Follow the on-screen instructions to install the new version of Java. During the installation, you may be prompted to customize the installation settings. Make sure to review and adjust these settings according to your preferences
Step 1: Check Your System
Before you start, determine whether Java is already installed on your system. Open a terminal or command prompt and type java -version. If you see a version number, Java is installed. If not, proceed to the next step.
Step 2: Choose Your Java Version
Decide whether you want to install the Java Development Kit (JDK) or the Java Runtime Environment (JRE). The JDK includes tools for developing Java applications, while the JRE is necessary for running Java programs.
Step 3: Download Java
Visit the official Oracle website (https://www.oracle.com/java/technologies/javase-downloads.html) or the OpenJDK website (https://openjdk.java.net/install/) to download the Java version of your choice.
Accept the license agreement if prompted.
Download the appropriate installer for your operating system (Windows, macOS, or Linux).
Step 4: Install Java
Follow these installation steps based on your operating system:
For Windows:
Run the installer you downloaded.
Follow the on-screen instructions, choosing the installation directory and any additional settings.
Once the installation is complete, open a new command prompt and type java -version to verify the installation.
For macOS:
Open the downloaded .dmg file.
Drag the JDK or JRE icon into the Applications folder.
Open Terminal and type java -version to confirm the installation.
For Linux (Ubuntu example):
Open a terminal.
Update your package list: sudo apt update
Install Java:
For OpenJDK: sudo apt install default-jdk
For Oracle JDK: Follow the instructions provided on the Oracle website.
Confirm the installation: java -version
Step 5: Set Environment Variables (Optional)
For some applications, you might need to set the JAVA_HOME and PATH environment variables. This step is crucial for development purposes.
You should see the new Java version displayed. Congratulations, you've successfully downloaded and installed the latest version of Java!
Conclusion:
Keeping Java up to date is crucial for enjoying enhanced features and security updates. By following this step-by-step guide, you can easily download and install the newest version of Java on your system. Stay ahead in the world of Java development by maintaining an updated programming environment.
Congratulations! You've successfully installed Java on your system. With Java up and running, you're ready to start coding and building amazing applications. Remember to keep your Java installation up-to-date by checking for updates periodically. Happy coding


